Results matching “Bird”

Tom Black performing a Zercher SquatI'm travelling for a couple of weeks (back around March 15). In the meantime, here are a few hidden gems from the archives.

Enjoy.

The Zercher Squat

This is the first in a series of Timeless Exercises; a collaboration with Run to Win's Blaine Moore. The Zercher Squat.

What is the Zercher Squat?

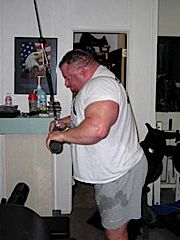
To the uninitiated, the Zercher Squat is a strange beast. Instead of the bar being held across the shoulders (slightly higher or lower for Olympic Weightlifters, Bodybuilders and Powerlifters); it's held in the crook of your arms. The inside of your elbows, if you like.

This is somewhat painful (although you do get used to it a little), however it's an extremely effective exercise. As Louie Simmons notes in Dead Lift Secrets :

It teaches you exactly how to squat. It teaches you to push your knees apart. Push your chest up. Push your buttocks out. The whole nine yards.

Origins

The Zercher Squat was one of the many cruel and unusual exercises created by St Louis strongman Ed Zercher (1902 - 1995). Zercher's own home gym resembled a junkyard more than a basement, and was filled with such toys as anvils, wrecking balls and assorted pieces of machinery. Sounds perfect.

Technique

This is one of the rare exercises where using a thick bar actually makes it more comfortable. A strongman yoke with an adjustable crossbar is great; a thick (2.5" - 3") barbell is also a good choice.

The lift comprises two stages, although it is common to see only the second one being performed in gyms.

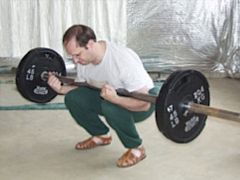
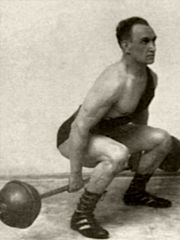
The weighted bar begins on the floor, and is deadlifted (using a conventional, or shoulder-width stance) to a point a little above the knee. Aim for the lower quad muscles, rather than your kneecaps.

Slowly squat down; balancing the bar at this point on your lower thighs. Slide your arms under the bar until it reaches your elbows. Now stand up.

Simply reverse the process to complete the exercise. That's one rep.

NB : You may notice that this movement resembles the action of lifting a heavy stone, and it can be a great way to help train for such an event.

How to hold the bar

Regardless of how you hold the bar, there'll be some pain involved. Whilst you can probably ignore it when there's 50kg on the bar, it's a different story when the bar weighs 200kg.

There are three things to consider here. Experiment with them and find the combination that feels right to you. They are :

How your hands are -

  • as fists
  • clasped together

How your forearms are -

  • crossed over
  • bringing your hands together
  • straight ahead (or at a slight angle)

What the bar is resting against -

  • your skin
  • a board
  • something soft, such as a towel

The videos below show a variety of these combinations.

Videos

The following videos will give you an idea of the various techniques that people are using for this wonderful exercise :

Power Circuit Training
Josh Henkin and Keats Sniderman
(partial Zercher Squat shown)

Zippy Videos
(130kg partial Zercher Squat shown)

Exercises You've Never Tried #18
T-Nation staff

425lb x 2 partial Zercher Squat [streaming, 1.3mb .flv download]


Old training clips compilation
from Chub

Other 'Zercher' exercises

There are several other exercises which use the same method of holding the bar. Try a few of these :

Of course, the original Zercher Squat is still a personal favourite. Definitely a keeper.

Resources

The Zercher Lift

A truly uplifting experience

USAWA

Wally's Place

Finnish Power
(thanks Kris)

Walter Donald - image via Iron BarbellI'm travelling for a couple of weeks (back around March 15). In the meantime, here are a few hidden gems from the archives.

Enjoy.

The Hack Squat

This is the third in a series of Timeless Exercises; a collaboration with Run to Win's Blaine Moore. The Hack Squat.

The Hack Squat is an exercise that seems to be commonly associated with a machine; however the barbell version is indeed a thing of beauty. If they aren't forming part of your current routine, perhaps it's time to give them a shot.

Origins

George Hackenschmidt - image via Sandow Plus
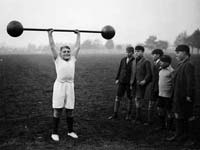
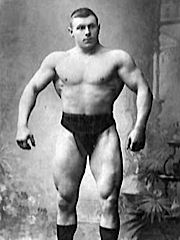
The exercise is usually thought to be named for its creator - or at least the first to openly harness its powers - wrestler George 'The Russian Lion' Hackenschmidt; or 'Hack'. As a wrestler he was seemingly unstoppable; competing in over 3,000 fights from 1889 - 1908 and winning all of them [1]. Yes, he was that good.

George Karl Julius Hackenschmidt (he was of Swedish descent, if you're wondering why he doesn't have a Russian name) was famous for many strength feats (including some that remained unequalled for an astonishing 50 years). The Hack Squat is at the centre of some of these (including a staggering 550 reps with 110lb).

A word on the name

The Way to Live - image via Super Strength Books
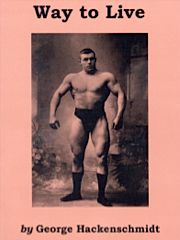
Although it is seemingly self-evident that the name 'Hack Squat' comes from the short version of his own name, Hackenschmidt claimed in The Way to Live that the name actually came from the word hacke, meaning 'heel'. Either way, the name 'Hack' is entirely appropriate.

Technique

Nate Dogg performing the Hack Squat - image via T-Nation
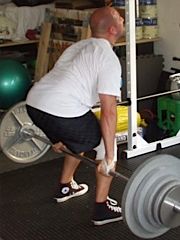
Load up a bar and place it on the floor. Stand just in front of it, with feet roughly shoulder-width apart, and grasp it with a double overhand grip. Stand up.

The bar itself will mainly move vertically (there's very little horizontal motion). As with a deadlift, think of your hands simply as hooks, keep your back straight and move upward until you're standing upright.

Muscles involved

Vastus Medialis
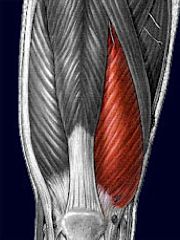
Although this is primarily a quadriceps exercise (especially for the
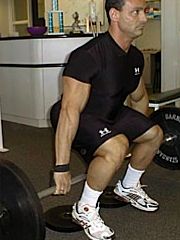
 Vastus Medialis), a number of other muscles come into play. These include [2]:

Synergists

* Gluteus Maximus
* Adductor Magnus
* Soleus

Dynamic Stabilizers

* Hamstrings
* Gastrocnemius

Stabilizers

* Erector Spinae
* Trapezius, Middle
* Levator Scapulae
* Trapezius, Upper

Antagonist Stabilizers

* Rectus Abdominis
* Obliques


Things to consider

Hack Squat with heels elevated - image via T-NationAs with other Squat varieties, there is a greater emphasis on the glutes when below parallel. Range of Motion is as important here as with any other exercise (with the usual exceptions, of course).

If you are unable to perform the full-range lift, simply set the pins of a power rack to the lowest position you can manage and perform them from there.

Keep the feet flat on the floor. If your legs are too tight to allow this, stretching is a better option that elevating the heels (standing on plates, for example). That said, elevate the heels if you find it's still necessary to perform the exercise.

During the upward portion of the exercise, push with your heels rather than your toes. This will help minimise the stress on your knees [3].

Conclusion

The Barbell Hack Squat's a great exercise - simple, inexpensive and quick to perform. If it isn't already part of your current routine, give it a run.


References

1. George Hackenschmidt: The Russian Lion.
By David Gentle
Natural Strength
(part 1, part 2)

2. Barbell Hack Squat
EXRX

3. Hack Squat
ABC Bodybuilding


Images and video

Nate Dogg Hack Squatting 140kg

132kg Hack Squat (thick bar) [929kb .flv download]

Singapore Sports Council (exercise demonstration)

Fitrex (exercise demonstration)

Mike Gill at the Kumite ClassicI'm travelling for a couple of weeks (back around March 15). In the meantime, here are a few hidden gems from the archives.

Enjoy.

10 Questions with Strongman Mike Gill

This is the first in a series of brief interviews I conducted with strength athletes from around the world. Hope you enjoy them.

1. Firstly, a bit of background. What is your name (and nickname), and where did you grow up.

Mike Gill. I was born in Buffalo, NY on November 19, 1972 making me 34 years old. I’ve lived in Buffalo and its suburbs for most of my life. I spent five years in Durham, NC where I owned three gyms, but returned home after never really adjusting to the area. Most people just call me Gill.

2. How did you get started in the sport?

I started seriously training with weights when I was 16. I had tinkered with them prior to that for years, but got dedicated after a “hardcore” gym moved into my town. I did a few bodybuilding shows in the 90s but I never could get lean enough. Besides, I like being bigger and training heavier; those two things don’t happen when you are getting contest ready. So for 10 years I just maintained my size and strength and did a few other things. I ran a few duathalons (run, bike, run) some 10k’s and did a short course triathlon. They fueled my competitive fire, but didn’t mix well with my body type. Ben Hanson (the other Chasing Kaz writer) suggested I try Strongman. I tossed the idea around for a few months and then after watching the 2005 WSM from China I decided to give it a go. I did my first strongman workout in March of ’06 and my fist competition 3 months later.

3. Which accomplishment (sporting or otherwise) are you most proud of?

Winning the Kumite Classic this year was a pretty awesome feeling for me. In my first year of competition I placed second in all three contests I entered; that was very frustrating. Getting the win assured me that I had the mental game to make it happen.

4. What are your goals for the next year or so? The next 10 years?

I would like to crack the top 5 at nationals this year. The competition keeps getting stiffer each year as the sport grows and that’s good, because it means the US as a whole is getting stronger at the sport. I think I have the tools to get my pro-card in the next 18-24 months, so that’s my long term goal. Other than that I would just like to stay healthy and continue to get bigger and stronger.

5. What changes in the sport have you seen over the years? What would you like to see?

I would like to see more odd events in contests, but standardization for getting your pro- card. That may sound confusing, so I’ll explain. To get your pro card now you have to win the amateur division at a pro-am or win Amateur Nationals. A few years back this was a good system as there were literally just a few competitors at each contest and the sport was much smaller. Now there are many guys competing for just a few spots each year, with many of the contests held in small remote locations. It’s expensive to get to and sometimes the best don’t show up, allowing a lesser competitor to earn a pro-card.

If NAS switched to regional qualifying meets then you would assure a more even system for earning a pro card. Qualifying meets would all have the same events and a certain time or number would earn you points. All participants with enough qualifying points at the end of the day would earn their cards. For example to earn a pro card you would need to clean and press a 300lb log 3 times, run a 315lb per hand 100 ft farmers walk in 24 seconds, deadlift a 800lb side handle apparatus, flip a 900lb tire for 50’ and then drag a 500lb sled, and then do a series of 5 stones to fixed heights for a certain time. This would open the doors for more competitors to go pro, find sponsors and become better athletes.

Contests should take an opposite approach though. Logs are now all steel and plate loaded; people can’t relate to the weight. Same thing with a bar that is loaded with 500lbs or 700lbs of plates, it all looks the same to the audience. To make it more interesting to the spectators (and therefore get more TV time) events should incorporate cars, safes, motorcycles, people, field stones; things that inspire awe in Joe Average when you lift them because they can relate to the objects.

6. Would you encourage up-and-coming athletes to follow the same path (as you have)? What would you do differently?

I didn’t find this sport until I was 33 years old, so that’s a bit late. What I would encourage younger athletes to do is try a variety of things until you find what you are good at and like at the same time. I’ve run into quite a few people who were good at something but no longer cared for it; it makes playing sports a chore instead of something great.

7. What types of training have you found to be most effective?

Low-volume, fluctuating intensity, high frequency training performed on the core lifts and events. It’s the method the Bulgarian Olympic lifters perfected that has given them a truck load of medals from the 70s on. You limit the amount of work in a training session, but train more often. Instead of wearing down the muscle in one session you condition it to recover faster so you can train it sooner. When applied correctly with proper recovery you can hit the same lifts multiple times per week and you are fresh each time. It’s great for me and my schedule.

8. What's your current training schedule like?

I’m a strength coach and personal trainer so I work a split shift every day. This enables me to train at around 11 AM every day (close to contest time) then eat and sleep immediately after. If I am doing splits I can get a second session in some time that afternoon.

Currently I train 4-6 days per week. I do one major lift during a training session like squats, press or dead and then do some auxiliary work. I limit training time to 40minutes. On Saturday I train events. We usually do 2 works sets per event and 3-4 events. We do this in about 2 hours.

9. What is your diet like - do you eat anything specifically to assist your training?

I eat a high fat, high protein diet, with moderate carbs. I rely mostly on food to get my calories and just a weight gainer or protein supplement if I am coming up short. I aim for a dozen whole eggs everyday along with 3lbs of red meat. I eat fish 2-3 times per week as well. My two sponsors are Perry’s Ice Cream and Braun’s Restaurant. I eat a ton so it makes it logical to have food companies behind me.

I stay pretty lean as well. I find it hard to get my bodyfat over 15% no matter what I eat. I compete at 280 and would like to be closer to 300 in the near future.

10. Are there any parting thoughts you'd like to share with our readers?

The most under-looked aspect of this sport (or any) is the mental game. In strongman you have to have great pain management skills. I’ve seen plenty of guys quit because they were tired or mentally beat, but still had the physical ability to continue. Doing sets of 10 reps with stones or tire flips for 2 minutes straight will get your conditioning up and raise your pain tolerance.

Consistency is key, as well. So many people want to know why they haven’t changed after training for just a few months. You need to be dedicated to your training, diet and recover for years to make the best gains.

Thanks for your time Mike - it's greatly appreciated. Best of luck in your next competition!


You can contact Mike - and keep up with the world of Strongman - via his site, Chasing Kaz. It's a great read.

150mm (6I'm travelling for a couple of weeks (back around March 15). In the meantime, here are a few hidden gems from the archives.

Enjoy.

Nails : Converting imperial to metric

Yesterday I finally had time to head over to a nearby hardware store, which still ranks highly on my list of cool places to just wander around. This time, however, I headed straight for the fasteners section : specifically nails.

I'm currently re-reading the Diesel Crew's Bending eBook (review), which discusses in great detail the many fun things to do with nails, bolts and other metal objects and the equipment and techniques necessary in order to do them. However, as I quickly discovered, the nails sold here these days are denoted solely by their metric measurements. The days of dual notation and handy conversion charts have gone.

For anyone who finds themselves in a similar position, here are a couple of charts which should prove indispensable.

Nail shank gauges (diametres)
Gauge sizes Decimal inches Decimal Millimeters
18 .049 1.24
16 .065 1.65
15 .072 1.83
14 .083 2.10
13 .095 2.41
12 .109 2.76
11 .120 3.04
10 .134 3.40
9 .148 3.76
8 .165 4.19
7 .175 4.44
6 .203 5.15
4 .238 6.04
Nail Lengths
Nail Penny sizes In fractions of inches In millimetres
2d 1 25.4
3d 1 ¼ 31.8
4d 1 ½ 38.1
5d 1 ¾ 44.5
6d 2 50.8
7d 2 ¼ 57.2
8d 2 3/8 or 2 ½ 60.3 or 63.5
9d 2 ¾ 69.9
10d 3 76.2
12d 3 ¼ 82.5
16d 3 ½ 88.9
20d 4 101.6
30d 4 ½ 114.3
40d 5 127.0
60d 6 152.4
70d 7 177.8
80d 8 203.2
90d 9 228.6
100d 10 254.0

A quick note on the pennies

If you're in North America, you've probably seen nail sizes written in terms of pennies (60D, 70D, 80D etc). This most likely originates from the former English habit of selling nails in hundreds, and the 'size' simply refers to the price. A 6 penny nail is of a size which sold for 6 pence per hundred, and so on.

Why the D? It stands for Denarius, a Roman coin similar to a penny.

I'm travelling for a couple of weeks (back around March 15). In the meantime, here are a few hidden gems from the archives.

Enjoy.

Row, row, row

This is just a quick look at several of the popular - as well as a couple of the less well-known - rowing exercises for the back. Naturally, there are many other ways to work the same muscles (particularly the lats), including the many varieties of pull-ups and pull-downs.

Bent-over row
For a long time, the Bent-over row was a bodybuilding staple. Despite being seen a little less these days, it's an excellent exercise. As with many on this list, there are several ways to do them.

Standard
Arnold - Bent Over Row
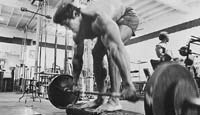
Stand with feet wider than shoulder-width (I realise Arnold's using a narrow stance here), with the loaded bar on the ground in front of you. Bend at the waist, bend legs slightly, flatten the lower back, grab the bar with a wide overhand grip and pull it to your chest. The plates should be just off the ground at the lowest point, and the bar is pulled to mid pecs.

Pendlay row
This is really just a very strict bent-over row, with the bar pulled to the abdomen. It is often performed using an underhand grip.

Yates Row
Yates RowDorian Yates famously used a modified bent-over row with great success. The differences from the standard variety are: standing more upright (torso at about 70°), use of an underhand grip (so as to allow more bicep involvement) and pulling the bar to the navel.

Dumbell row
With one knee and one hand (left knee and left hand if working right side) on a bench, and a dumbell on the ground at its side, grab the dumbell and lift it straight up by contracting your lat and bending your arm. Slowly lower it, and repeat.

Dumbell row (tripod)
Draper - DB row (tripod stance)
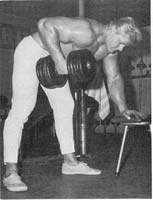
Rather than placing one knee on the bench, stand behind the bench and only use a hand for support. The front leg should be slightly bent, the other one a little further back (but straight). Lift the dumbell as usual, but add a slight twist at the top to increase the ROM.

Lying row
This is essentially a bent-over row done whilst lying face-down on a bench. The bar is pulled to the chest (or as close as the bench allows).

T-bar row
Arnold - T-Bar Row
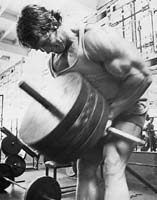
I first saw Arnold doing this many years ago - a very impressive looking exercise. With the weight on one end of a bar (and something else holding down the other end), straddle the bar, grab it a little below the plates (with both hands) and pull it to your chest. Note - if the other end of the bar isn't weighed down enough, you won't be having kids anytime soon.

Chest supported row
Somewhere between a T-bar row and a Lying Row, only using an incline instead of a flat bench.

Seated Cable row
Draper - Lat Row
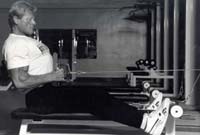
Grab the handle, lean back slightly with legs bent and pull handle to waist. Pull shoulders back, push chest forward and straighten back during contraction. Return until arms are extended, shoulders pulled forward, and back flexed.

Customisable Pro 3x3 rack over at EliteFTS.I'm travelling for a couple of weeks (back around March 15). In the meantime, here are a few hidden gems from the archives.

Enjoy.

Buyers' guide : the Power Rack

With most of the equipment in my home gym, the current setup is more than reasonable; however I'd probably change a few things if I was starting again. The humble Power Rack - the core of the gym - is no exception to this. If you're about to buy one, here are a few things to consider.

Height

If you're planning on doing any overhead work (Military Press, Overhead Squats etc), you'll need a bit of headroom. This will require both a high ceiling and a tall rack (mine is about 7' tall - high enough to stand in, but I'm forced to do seated versions of the above exercises).

For chin-ups, make sure there's enough room above the rack for your head to clear it comfortably (particularly if kipping's your thing). Also check that there aren't any light fittings overhead (sounds obvious, but you'd be surprised).

Weight, weight stands

Nearly every rack on the market these days will comfortably take several hundred kilos. This is fine for most people, and the small percentage of the population who demand heavier weights (and I really can't blame them) will probably already have their favourite rack picked out. If not, take a look at these over a EliteFTS.

On a side note, it can be extremely handy to have a few bars on the rack itself to hang plates on. Especially once you get into your work sets.

Attaching bands

Whilst you can always loop bands over heavy dumbbells, hooking them directly onto the rack is much, much simpler. If you regularly use bands in your training, a rack with a selection of dedicated hooks or pins is definitely worth looking at.

Spacing of pin holes

One of the things that delineates the cheaper racks from the ones that people are seen drooling over in garages everywhere is the spacing of the pin holes (the holes down the side of the rack that the pins are placed in). Within reason, a smaller gap between the holes allows for a greater degree of flexibility. Anything down to about 1" is fine (the cheaper racks have a gap of 2" or more).

Want to work on your sticking point from just there? Now you can.

NB : the spacing sometimes varies within the one rack. If it does, the finer spacing will most likely be in the middle of the working range; where it can be used to your advantage.

Extra J-hooks, extra pins

By default, many racks only come with a single pair of J-hooks (the hooks the bar sits in just prior to the lift). A second set can be extremely handy - for the other side of the rack (either internal or external).

Extra pins are also extremely handy for restricting the range of motion. For several great ideas on this see the Altering Barbell Kinetics ebook (free) I mentioned a while ago.

Width

Although the width of a barbell never changes (within one type, that is - standard bars are about a foot shorter than their Olympic counterparts), the width of racks vary from brand to brand. The rack's minimum width will depend largely on what you're going to do with it.

Sumo squats and rack pulls will take the most room; somewhere around 40" would be an absolute minimum, but your best bet is to measure your own squat (outside one foot to outside the other).

If you intend to bench press in the rack, or use the bench as a seat for other exercises (such as the overhead work I mentioned earlier), make sure the bench fits. If you're buying them both at the same time, great. Test them out.

One more thing to note with the bench inside the rack - if you plan to use dumbbells from the bench, make sure there's plenty of room to drop the dumbbells once they get heavy. Oh, and something to protect the floor (in the drop zone) is always a good idea - a couple of rubber mats will do nicely.

Optional extras

Whilst the rack is an extremely versatile piece of equipment, there are a few optional extras that are well worth considering. These are :

dip bars : these often hook on to one of the pins, and will stick out from the rack about the same distance as a loaded barbell. alternate solutions make use of the free space in front of the rack.

lat pulldown : whilst this takes up some of your rack's depth, it makes pulldown work nice and accessible.

step-up platform : although you can always use your squat box for these, a dedicated platform is both stable and always there. a great accessory.

storage hooks for bars : these are usually on the outside of the rack (to the rear), and ave very handy if you regularly use several different bars in your training.

storage hooks for bands and chains : these are generally on the sides of the rack (facing out), and are great for hanging the bands and chains you're not using for that particular set.

Overall space in your gym

One final question - how much room will a rack take up in my gym?

As noted above, racks vary a little in size - particularly in width. If you allow enough room to walk around it, you'll be fine. Happy shopping.

Used plates (from Lifestyle Fitness)I'm travelling for a couple of weeks (back around March 15). In the meantime, here are a few hidden gems from the archives.

Enjoy.

Bars, Plates,Hooks and Collars

This is the third in this month's article series on strength training equipment - a collaboration with Run to Win's Blaine Moore. Today I'll be looking at a few of the essentials for any gym - bars, plates, hooks and collars.


Standard vs Olympic

When I began lifting weights - a little under 3 years ago now, although I gave them a few brief tests a decade or two ago - I started the home gym off with a bench, bar, dumbbells and plates. These bars were standard (rather than Olympic); as were all of the plates.

It was not until several months later I became aware of the differences, and began switching over to Olympic bars and plates. So what are the differences?

There are six key differences between Standard and Olympic plates. If you're aiming to compete in a powerlifting or Olympic lifting event, the Olympic bars and plates are an obvious choice. However, they may still be worth considering for their other differences. These are :

diameter (of hole, bar) : Standard bars are less than 1" in diameter, whilst Olympic bars are a more noticeable 2" or so. This instantly increases the grip component of many lifts.

length (of bar) : a Standard bar measures either 5', 6' or 7' (the 6' seems to be the most common); an Olympic one is always 7'. The extra length increases the stabilisation component of many exercises.

weight (of bars) : a Standard bar weighs in at around 10kg, an Olympic one a much heftier 20kg. The weight of an Olympic bar is easily included in calculations for total weight, as it equals the same as a large (20kg) plate. Whilst there are both heavier and lighter plates available, the 20kg (44lb) is common.

cost : the major factor in the favour of Standard bars and plates is the cost, which is generally considerably cheaper than the Olympic counterparts.

comparison : for both calibration and historical reasons it is usual to see Olympic bars and plates used in competition. However, even if you're not competing, it's great to be able to instantly compare your own lifts to those you've seen on the platform.

threading and knurling : Standard bars often have threaded ends (for the collars), whilst Olympic bars are typically smooth throughout this section. Olympic bars also differ in the knurling on the bar, which is similar from bar to bar, unlike the knurling on Standard bars. This knurling is used not only for grip, but to line your body up in various exercises.

availability : another factor that should be considered when purchasing new bars or plates is their availability. Both new and second-hand bars and plates are more easily found in Standard sizes. When it comes to buying plates - particularly at this time of year - a great place to start is the nearest garage sale. Joe Skopec has a great article on cleaning up the rusty iron you often come across in such a sale.

Fat bars

Fat bar pushdown
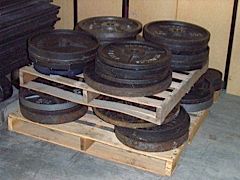
If you're looking for a little more of a grip challenge than an Olympic bar affords, consider either making or purchasing a fat bar. A typical diameter of a fat bar is 2.5' - 3'.
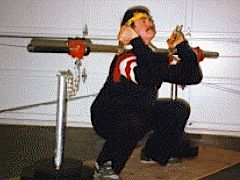
One thing to keep in mind - especially if you're fattening up your own bars - is that the plates themselves will be unchanged (whether Standard or Olympic); only the bar itself will be altered. For a very simple way of doing this, take a look at a couple of pictures of my chinning bar being given the fattening treatment. A similar process was then employed to thicken up a couple of dumbbell handles.

Hooks

J.V. Askem performing Front SquatIf you've ever tried Front Squatting, you may have considered using the Hook method. This is the DIY gym enthusiast's version of the Top Squat device; employing two pipe wrenchs or long-handelled vices to hold the bar as pictured.

1-Ton Hooks
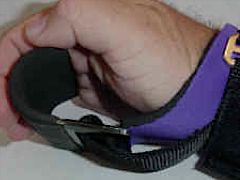
Other hooks sometimes used in conjunction with the bar are those which are connected to wrist straps (the 1-Ton Hooks are perhaps the best known), and reduce the grip component on lifting exercises such as shrugs, rows and the deadlift.

Power Hooks
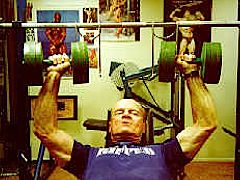
For dumbbell pressing exercises when a spotter is not present, Dumbbell Hooks (usually Power Hooks) are invaluable. These allow the bells to be suspended close to the starting and finishing position of the exercise, and remove the need to hold the dumbbell as you get into position.

Collars

Collars are placed on the bar just outside the plates, in order to prevent the plates from sliding along the bar. This sliding is not only dangerous for anyone standing near the end of the bar (if you've ever dropped a plate on your foot you'll understand this), it's also a good way to upset any lift. Think back to the last time you performed a squat with the bar slightly off-centre.

There are several varieties of collars, and these differ widely in their weight. Be sure to include the weight of the collars in your training notes - for the heavier varieties in any case.

The most common types are :

Spring collar
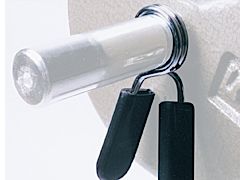
Spring collars : I use these for light weights only. They're quick to affix/release, but they tend to move a little when there are heavier weights involved.

Compression collar
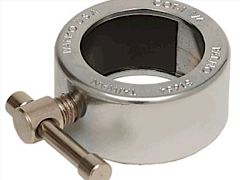
Key or pin lock (aka shaft or compression collar) : the home gym contains a pair of dumbbells with the older key lock (an Allen key must be used to remove the collars). I generally use the new style of these which has a pin (permanently in place) instead of the key. Much faster to change.

Spinlock collar
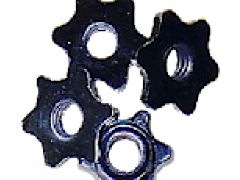
Screw thread (such as the Spinlock collar) : designed for the threaded Standard bar, these collars are simply spun into position. Whilst secure enough, their one drawback is the relatively slow changeover speed.

Okie Grip collar
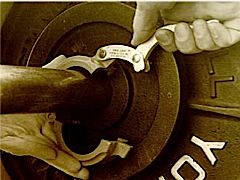
Lever locking (such as the Okie Grip) : I've never tried these, but they're certainly secure with heavy weights (take a look at some of the photos on the Strength Tech site), and are definitely in the game as far as speed is concerned. If anyone has tried them, I'd love to hear about your experience.

Tara ScottiI'm travelling for a couple of weeks (back around March 15). In the meantime, here are a few hidden gems from the archives.

Enjoy.

Specific Training for the Transverse Abdominis: Belt It In

For most people, specific-training ab routines include a variety of spinal flexion movements designed to emphasize the rectus abdominis, the vertical muscles on the front of the core (rectus = erect). In the weightroom, these include familiar exercises such as crunches, reverse crunches, sit-ups and Roman chair leg lifts (although the chief emphasis ends up going to the hip flexors in such leg lift exercises more often than not). In the yoga or Pilates studio, they include a variety of V-sit exercises. While all of these may, if performed properly, leave your core stiff and sore the following days, if these make up your entire abs routine, there is an important abs muscle that you are neglecting -- transverse abdominis.

The transverse abdominis runs horizontally, in the transverse plane of the body (trans = across). A simple way to think of it is that it acts like a belt, drawing your entire core in more tightly to your vertical midline. And that's exactly what you want in order to give your waist a narrow appearance. The exercises for this ab are different from the ones mentioned for the other abs. They may not sound like much and certainly won't look as dramatic as, say, your big bench or monster squat. But if you've been doggedly crunching away and still don't want anyone seeing your exposed belly until you're good and ready, training the TA may be exactly what your program needs.

Most people have some innate sense of how this muscle works, and proof that it's the key to a great midsection is right there. Think about the old phrase "sucking in your gut." When people who have no idea how to work out want their tummies to look good, they instinctively try to draw in their abs like the Frank Zane vacuum pose. This movement bears no resemblance to a crunch-type movement. They do not bend over. Their hip flexors remain neutral. The only bodypart they try to affect is the TA. And crude as it may look, bodybuilders take notice: they've got something there.

The TA is a deep layer of horizontal muscle fibers that does not appear to be directly involved in joint movement. This muscle can indirectly add to spinal support by providing belt-like opposition to intra-abdominal pressure, which creates a column of support for the spine as well as the trunk area (NASM, 106). In order to work the TA, then, concentrate not on challenging spinal flexion but rather spinal stabilization in neutral alignment.

Begin by becoming aware of this muscle. Sit upright on a bench. Have a partner face you, place both of his hands on your shoulders, and gently push you backward (gently!). Your goal is to maintain your upright position, not allowing your spine to extend/your back to arch. Your TA will kick in to achieve your goal.

Here's a visualization to help you zero in on this muscle: imagine you are pulling your belly button into your spine. Place your hand on your belly button and try it, and you'll realize what a dramatic difference actuating this muscle makes. Strengthen it, and you'll have just that much enhancement to the appearance of your midsection.

Here's something you can do while you're driving. Whenever you hit the brake, contract your TA. The momentum of moving forward will provide tangible, manageable resistance. This is a great way to get in some TA work in daily life.

Keep the exercises distinct from your other ab and core exercises. You may perform them in the same workout, and indeed you should keep your TA tight throughout most of your exercises as a rule. But set aside a few specific moves to devote to training your TA alone. Train your belt on the inside, and you'll be tightening up the one on the outside.

The program


Exercise 1: The Cross

Stand upright with your arms straight out to your sides. Bend slightly at the knees. Position your spine in optimal neutral alignment. Now contract your TA in reps, using the visualization above. Push your belly button into your spine. No kidding, this alone can be very taxing, with proper form and energy.

Exercise 2: Cable pulldown

Attach a rope handle to an overhead cable pulley. Select weight, face away from the machine, and pull the handle down so the rope is resting comfortably over your traps. Kneel on the floor, holding the rope tightly in place. Maintain an erect posture from the knee up. Now are you are ready to begin the movement. Pull in your belly button as before, and allow that contraction to pull your torso down slightly and your navel up slightly. The key is slightly! Your hips should not flex at all. This is a very small movement, but done properly, it engages the entire abs group, and is a real smoker.

Exercise 3: Hanging TA
Suspend your body, using elbow slings or simply gripping neutrally positioned pull-up handles. This is similar to the cable pulldown; maintain a neutral posture, keep hip flexors relaxed, and contract the TA first, pulling the rectus abdominis with it.

Exercise 4: Ball Toss
This is a very advanced exercise. Be sure that your TA is adequately strengthened through the above exercises before attempting it. Use a decline bench. Anchor your feet under the rollers. Sit upright. Align your spine in a strong neutral position, activate the TA, hold the contraction and have a partner gently toss a lightweight (three to five pound) medicine ball to you, aiming at your stomach. Catch and toss it back to her. Repeat. Resistance can be increased by leaning back at the hip and by your partner aiming higher. Use your partner to monitor your posture. It is far too easy to relax the spine into spinal flexion, exaggerate the natural curves in the spine, and flex the hip joints in order to accomplish the ball handling. But to catch and return the ball is not your main goal; your goal is to maintain a neutral spine and keep your TA contracted constantly while handling the ball. Do it right, and it's a killer.

References

National Academy of Sports Medicine Personal Training Certification Manual, 1999.

BackThis is a guest post by powerlifter Rick Walker, CSCS - Addressing Weaknesses in The Squat. Strap yourself in, this is a good one.

If you read most strength related material on the web today, you are going to come across a lot of talk about training weaknesses. This is great information, however, if you aren’t sure what the weakness is, how are you going to address it, train it, and fix it? The best way is to have a competent lifter watch your squat form with heavy weights, then break down what you are doing wrong. That isn’t always the best option. I mean, lets face it, it is downright impossible to find a “competent lifter” in the gym environment! So, I will go over some typical squat faults, what causes them, and what you can do about them to get your squat on the rise again.

Bending at the knees first

This is a common problem among many beginning squatters as the lifer is usually afraid of falling backwards with the weight. Instead of sitting back first, the lifter will bend at the knees to go down. This causes the knees to go forward well over the toes and often times causes the lifter to go up onto their toes in the hole. This is not only dangerous, but you are limiting how much you can squat. The pressure on the patellar tendons in this position is tremendous and leads to big time problems down the road.

Yes, some lifters, especially Olympic lifters, can adapt to these kinds of stresses from having their knees that far forward. Look at how far the knees are here:

However, the goal here is to improve the squat and move more weight, and that will be accomplished by sitting back into the squat.

How to fix it

The lifter must learn to sit back and not down. This can take a long time to get them to do, and even longer to get them to do it under maximum loads. I start all newbie squatters on a box.

I use a very high box and a very light load, usually the empty bar with some light JumpStretch© bands attached for tension. The basic commands I give are for the lifter to sit back like he is searching for a chair that is behind him. Once the lifter can get down to the high box by sitting back, I lower it an inch and start all over. Eventually the lifter will be able to sit back to a parallel box and the movement will become second nature.

Another possible reason for the lifter’s inability to sit back is hamstring strength. If the lifter has weak hamstrings, he won’t be able to sit back into a squat without falling. It gets much worse as the weight increases. To address this, get the lifter on the glute-ham machine pronto!

This is the best way to bring up lagging hamstrings and prepare the lifter for handling more weight in the squat correctly. I have also found Romanian Deadlifts and reverse hypers to be effective for improving the sit back portion of the squat.

Knees come inward on ascent

This is probably the second most common error made by a squatter. The lifter usually descends well, but once they hit depth and attempt to come back up, the knees shoot inward leaving the lifter in an awkward and dangerous position. The reason this happens is usually linked to weak hips. The hips are weak, and therefore the body, in attempt to lift the weight, will draw the knees inward. This places the stress on the stronger quadriceps muscles.

How to fix it

Direct hip work will help immensely, but the lifter also needs to learn how to squat. The quickest way I have corrected this with lifters is to take a min JumpStretch© band, double loop it, and put it around the lifters legs at about knee height while they squat lighter weights. The lifter’s goal is to keep the band tight and not let it fall down their legs. This will cause them to focus on proper knee position and really driving the knees out, not only during the ascent, but also during the descent. If you do this often enough, it will become second nature for the lifter to drive his knees out during the squat. I have found this to be most useful during wide stance box squat training. The lifter will be handling a lighter load, 50-60%, and thus can focus on the proper mechanics and keeping the band around their knees tight. Once it becomes second nature, there will be no need for the band.

Direct hip work via handle squats, pull-throughs, kettlebell swings, and belt squats will also help bring the hips up to match the strength of the quadriceps. When doing any type of direct hip work, make sure to really drive the knees out and make a conscious attempt to ‘spread the floor’ with your feet. Drive your feet hard into and out against the platform to assure proper hip activation.

I'm travelling for a couple of weeks (back around March 15). In the meantime, here are a few hidden gems from the archives.

Enjoy.

The lost art of overhead pressing

Overhead pressCharles Poliquin takes a quick look at Overhead Pressing and suggests a 12 week program for its use. Having only recently tried a couple of sets myself, I personally can see a bit more overhead work going on. Unfortunately the low roof means that this will be seated only, but that's still a good start.

There were a couple of ratios mentioned in the article, and after Alberto got everyone going with the Achieving Structural Balance piece, I can see a similar thing happening here. They are :

1. The ratio between seated dumbbell overhead presses and the bench press It should be that the weight done for 8 reps on each dumbbell represents 29% of the close-grip bench press measure. In other words, a man able to close-grip bench about 220 pounds for a single would use a pair of 65's for 8 reps in the seated dumbbell overhead presses.
2. The ratio between the behind-the-neck press and the bench press The weight for a 1 RM behind-the-neck press from a seated position should represent 66% of the weight used for a 1 RM in the close-grip bench press. That load is lifted from a dead-stop position with the bar resting on the traps, not from a weight handed off in the lock-out position.
  1 2 3 4 5 6 7 8 9 10 11 12 13 14 15 16 17 18 19 20 21 22 23 24 25 26 27 28 29 30 31 32 33 34 35 36 37 38 39 40 41 42 43 44 45 46 47 48 49 50 51 52 53 54 55 56 57 58 59 60 61 62 63 64 65 66 67 68 69 70 71 72 73 74 75 76 77 78 79 80 81 82 83 84 85 86 87 88 89 90 91 92 93 94 95 96 97 98 99 100 101 102 103 104 105 106 107 108 109 110 111 112 113 114 115 116 117 118 119 120 121 122 123 124 125 126 127 128 129 130 131 132 133 134 135 136 137 138 139 140 141 142 143 144 145 146 147 148 149 150 151 152 153 154 155 156 157 158 159 160 161 162 163 164 165 166 167 168 169 170 171 172 173 174 175 176 177 178 179 180 181 182 183 184 185 186 187 188 189 190 191 192 193 194 195 196 197 198 199 200 201 202 203 204 205 206 207 208 209 210 211 212 213 214 215 216 217 218 219 220 221 222 223 224 225 226 227 228 229 230 231 232 233 234 235 236 237 238 239 240 241 242 243 244 245 246 247 248 249 250 251 252 253 254 255 256 257 258 259 260 261 262 263 264 265 266 267 268 269 270 271 272 273 274 275 276 277 278 279 280 281 282 283 284 285 286 287 288 289 290 291 292 293 294 295 296 297 298 299 300 301 302 303 304 305 306 307 308 309 310 311 312 313 314 315 316 317 318 319 320 321 322 323 324 325 326 327 328 329 330 331 332 333 334 335 336 337 338 339 340 341 342 343 344 345 346 347 348 349 350 351 352 353 354 355 356 357 358 359 360 361 362 363 364 365 366 367 368 369 370 371 372 373 374 375 376 377 378 379 380 381 382 383 384 385 386 387 388 389 390 391 392 393 394 395 396 397 398 399 400 401 402 403 404 405 406 407 408 409 410 411 412 413 414 415 416 417 418 419 420 421 422 423 424 425 426 427 428 429 430 431 432 433 434 435 436 437 438 439 440 441 442 443 444 445 446 447 448 449 450 451 452 453 454 455 456 457 458 459 460  

Pages

Powered by Movable Type 5.2.7